This is an advertisement. The offers featured on this site are from companies from which this site receives compensation. This also influences where, how, and in what order such offers appear.
How to Remove DriverToolkit
August 31, 2019
Nowadays, software solutions are readily available for anything you might search on the internet. However, many of these products are not as good as their developers might lead others to believe.
On the contrary, some of these products degrade the performance of devices and disrupt your experience. In this article, we will discuss a similar utility tool known as ‘DriverToolkit.’ Find out how you can uninstall DriverToolkit and free your device from an additional burden.
Advertising Disclosure: Many or all of the companies featured provide compensation to us. These commissions are how we maintain our free service for consumers. Compensation, along with hours of in-depth research, determines where & how companies appear on our site.
You can now get all the great benefits of anti-virus protection without spending money or waiting for a sale. Check out how you can protect iOS and Android devices and much more.
DriverToolkit is a software utility tool developed by Megaify Software Co. The purpose of this tool is to clean, repair and optimize the performance of computers. A number of people download the tool to install or update an operating system’s core drivers and perform driver backup.
DriverToolkit claims that its database of drivers and hardware devices consists of more than 12 million entries. Initially, the tool can be useful for people who don’t have the necessary drivers in their operating system. However, after a certain time, it starts to become an unnecessary burden on the operating system.
For this reason, many antivirus engines such as TotalAV, Avira, and others classify the application as a potentially unwanted program (PUP). Its inclusion in the PUP category is due to the application’s doubtful system’s optimization procedures and unauthorized installation of some drivers.
One of the most common problem people reports after DriverToolkit installation is the degradation of device performance. This happens because DriverToolkit.exe uses a high amount of CPU power to keep searching the system for updates.
The 32-bit .exe file responsible for can be found in the Program Files folder in the C: drive. Its root folder is usually named as DriverToolkit, and the file uses it as a base to install additional drivers in the operating system. Experts have found that the DriverToolkit application usually downloads or installs only Megaify software products.
First, the application downloads and installs the DriverToolkit.exe file. After that, it creates a Startup process that starts working each time a user logs into the operating system. As a result, the DriverToolkit optimizer tool launches regular system scans.
After each scan, the application transmits data about the system to a distant server for identifying problematic drivers. Subsequently, DriverToolkit supposedly downloads patches and updates to rectify the problems in current drivers of the system.
However, in reality, the application behaves like a virus. It issues unauthorized downloads and installations for software created by its parent company and causes severe system slowdown. In worst cases, these slowdowns can cause hard disk failure and multiple problems in the Windows operating system.
Nevertheless, if you try to remove the DriverToolkit application, you will be unable to do so. DriverToolkit attributes itself to important system drivers in the operating system. This is why when you try to get rid of the software manually via the Control Panel, the un-installation process will result in an error message.
No. Although DriverToolkit is not a virus, you should not trust the application to make installations on your device. The application has been known to display predefined scan results instead of optimizing the system. It scares users into purchasing its license after making false claims about its efficiency.
Furthermore, the more time your operating system hosts this application, the higher is the risk of damaging the operating system. Over time, users will experience various Windows errors and frequent slowdowns because of excessive CPU memory consumption by DriverToolkit.exe.
Since it is difficult to uninstall the DriverToolkit application manually, you will have to install an antimalware application. The antimalware tool will remove every component of DriverToolkit from the operating system.
By now, users must understand that they should never trust any free optimization tool. The majority of all free applications either have limited features or are not as effective as the developers lead you to believe.
However, the real problem with such free applications is that they also install additional applications during their own installation. As a result, the operating system contracts harmful software that damage the computer even more.
Free applications label these malicious programs as recommended tools and mark their installation by default. Consequently, when the user continues with installation process inattentively, they allow the installation of such programs by themselves.
To prevent users from installing malicious elements by themselves, we advise users to install all free apps using through the custom installation option. You should every document attached to the installation process carefully and opt-out of any additional installation. In fact, it is wiser to avoid installation of free programs that pave the way for potentially unwanted programs.
Protect Your Devices Today!
Cyber attacks can happen at any time and when you feel protected. Total AV offers the protection that you need but won’t break the bank. You can get the free security and peace of mind that millions of other people around the world use daily. With security that you use every day, you can rest assured that there is someone looking out for you. Download a free copy of Total AV Today!
Medium. The application does not harm the operating system directly. Instead, it overburdens the computer memory with unnecessary programs and downgrades system performance. Both of these things lead to hard drive failure and issues with the operating system.
Symptoms of the Virus
Severe lagging of operating system. Your computer will take time to perform even simple tasks. Additionally, DriverToolkit will put strain on the CPU usage, which you can see in the taskbar.
Distribution Method
Usually, the application markets itself as a legitimate application and uses false advertising methods to promote itself. It conducts predefined system optimization scans to persuade users into buying its product.
Detection Tool
DriverToolkit attribute itself to system applications and drivers. Therefore, it isn’t easy to remove the application through traditional methods. Users will need a powerful antimalware application to remove DriverToolkit.
In our opinion, TotalAV antivirus is thebest tool to remove DriverToolkit.
TotalAV stops unwanted programs and viruses before they infect your computer. If these programs already exist o your computer, TotalAV eliminates them from the system and deletes their core files.
Removing the program through traditional methods will have no effect since the application classifies itself as a system app. Therefore, you should use the techniques below to remove the DriverToolkit from your computer.
1) Reset Browser Settings
Since DriverToolkit installs additional application attributed to its parent company. The program might also install add-ons and browser extensions issued by its developers. To remove these additional applications, you need to restore your web browser’s default settings.
Resetting the browser is a useful option because it removes malicious elements of the DriverToolkit. Moreover, it deletes any additional components that the DriverToolkit virus allowed into your system. Just follow the steps below:
Step #1
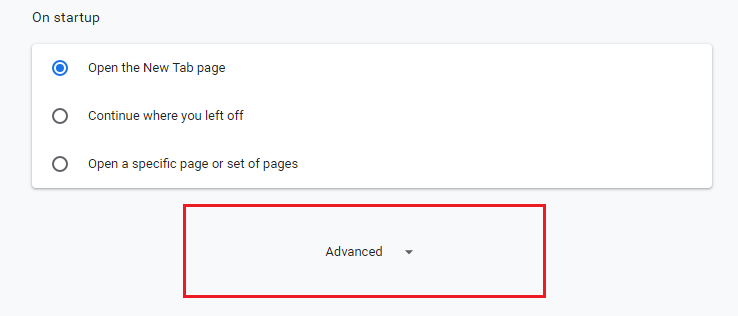
Open the Google Chrome browser and look for the icon at the top-right corner of the browser screen. When you click this option, you will see a list of other options, select Settings to change browser settings. Once settings open, scroll down, and click the ‘Advanced’ option at the bottom of the screen.
Step #2
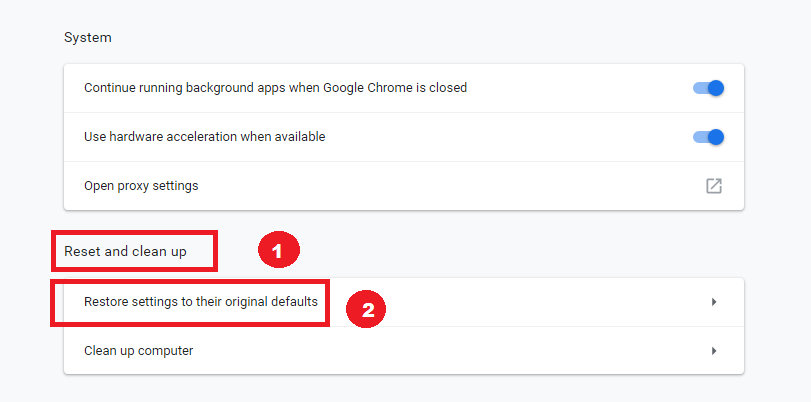
After opening the advanced settings in your browser, you have to scroll down to the “Reset and Clean Up” option at the bottom. There, you will see “Restore settings to their original defaults,” which you will have to click.
Step #3
After completing the last step, you will see a pop-up that asks you if you want to reset settings. Just click on the “Reset Settings” options to remove additional applications form the browser.
2) Install the Total AV Antivirus
When it comes to keeping unwanted programs at bay, TotalAV software is one of the best antivirus solutions in the market. So, installing it necessary to remove DriverToolkit from your computer.
Step #1
First of all, open your web browser, type “TotalAV download” in the address bar, and hit Enter. After that, click on TotalAV’s official website in the search results. Download the free version of the application clicking on “Download Now.”
Step #2
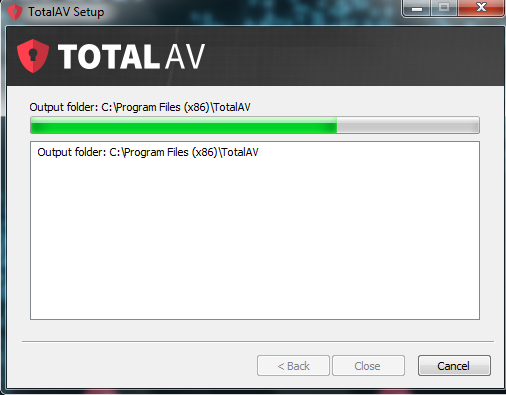
Select the “Install” button on the resulting window and choose ‘Yes’ when the operating system asks for your permission. After that, wait until the installation process completes.
Step #3
After you install the antivirus successfully, you need to restart the computer in Safe Mode. Running the computer in Safe Mode allows the computer to run on minimal resources. This makes it easier for users to remove all existing problems without interruption.
The Safe Mode prevents start-up programs; corrupt hardware drivers; and malware programs and facilitates malware removal. The following method instructs how you can restart your device in Safe Mode in Windows 10:
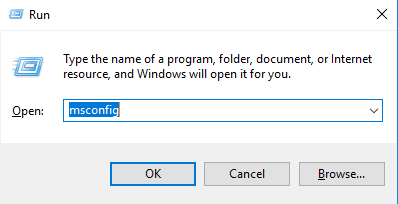
Open the run command interface by pressing “Windows Key + R” simultaneously. After that, type “msconfig” to open settings.
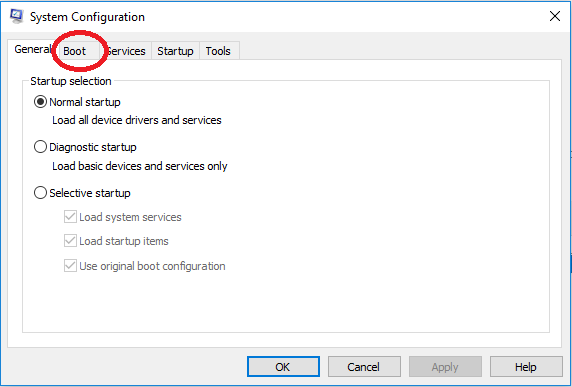
2. Once the system configuration opens, click on the Boot option available in the top section of the window.
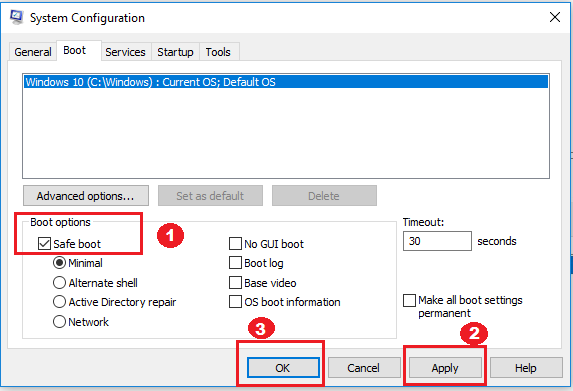
3. After that, select the checkbox beside the label “Safe Boot,” click on “Apply” and select OK.
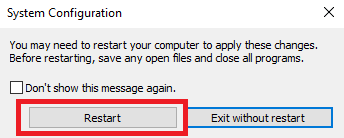
4. Once you select the Safe Boot option, a System Configuration window will pop up to ask permission for restarting the device. Choose “Restart” and wait until the computer turns back on.
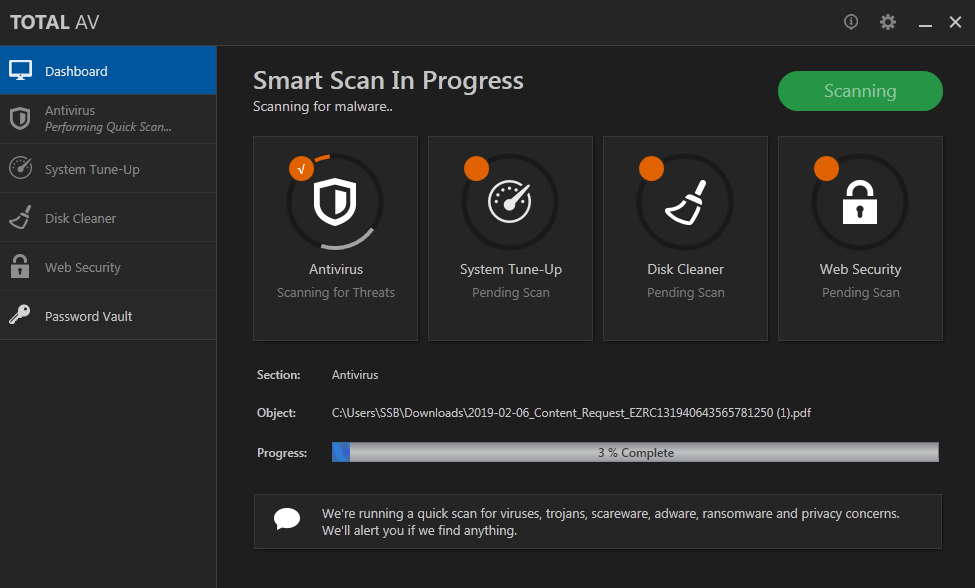
Step #4
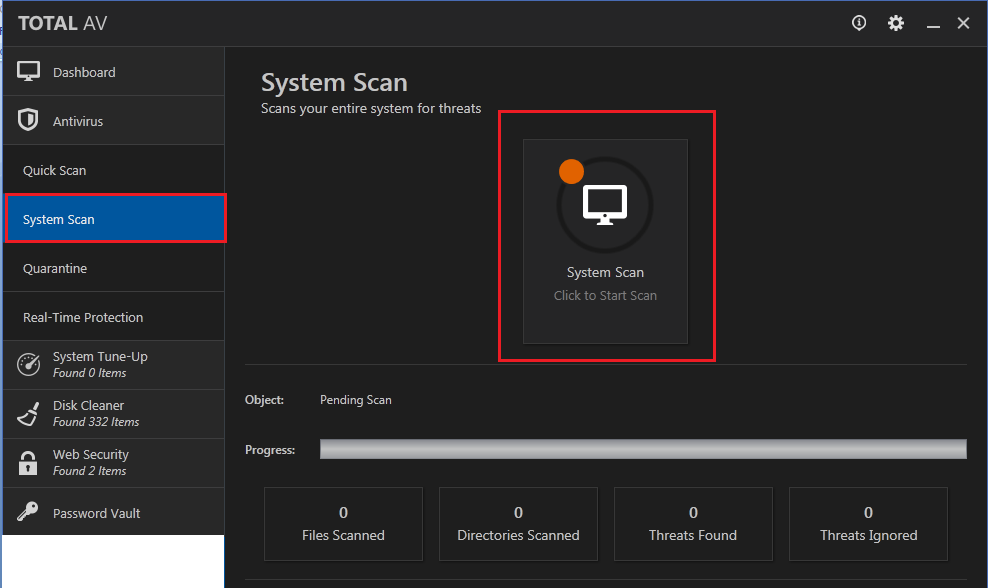
Understandably, the application will take some time since it has to detect every threat in your operating system. You can wait while the antivirus detects and removes all vulnerabilities in your operating system.
Step #5
After the scan completes, all viruses will be removed from your computer. However, sneaky Trojan viruses like DriverToolkit can survive and end up in the “Quarantine” section. Remove the virus by selecting the white checkbox on top of all other checkboxes and select the “Delete” option to remove all remaining malware files.
Get Protection from Cyber Threats for Free!
Total AV is the best choice for anyone who wants online protection at a low price because you get free protection from the world’s top threats. When you download today, you even receive a 30-day money back guarantee. What are you waiting for? Get your free copy of Total AV Today!
DriverToolkit falsely claims to improve the performance of your computer. It can mislead users into buying a worthless product. Using manual techniques to improve the performance of your operating system is tedious, to say the least.
Instead, we recommend our readers to install an all-round solution that give them a plethora of useful features. TotalAV is a potent antivirus application but also provides unique features as disc cleaning.
Not only does TotalAV save its users from incoming security threats, but also optimizes the system for greater performance. It also allows users to benefit from a secure VPN connection for securing their personal information.
Don’t waste your time and get TotalAV antivirus today.
Victims of this scam receive emails that threaten to release compromising images of them if they don’t pay up. Security experts dubbed these intimidating emails as the Blackmail Porn Bitcoin Email Scam. In this article, we will discuss why these threats are only a scam and how you can remove Blackmail Porn Bitcoin Email Scam from your computer.
Many people use parental control applications to monitor their kids’ online browsing activities. However, some of these applications can expose your child’s device to harmful malware. Covenant Eyes is a software designed for monitoring online activity. Therefore, it helps parents keep a check on their children’s browsing activities.
Nowadays, a number of online programs provide us with several features without charging us. Although it seems that these programs are free, that is not always the case. Some of them attract users by providing a free service and then leverage their user-base for sponsored advertising. In this article, we will talk about a similar service known as ‘WeatherBug.’ Find out how you can uninstall WeatherBug and end a stream of annoying ads.
Nowadays, software solutions are readily available for anything you might search on the internet. However, many of these products are not as good as their developers might lead others to believe. On the contrary, some of these products degrade the performance of devices and disrupt your experience. In this article, we will discuss a similar utility tool known as ‘DriverToolkit.’ Find out how you can uninstall DriverToolkit and free your device from an additional burden.